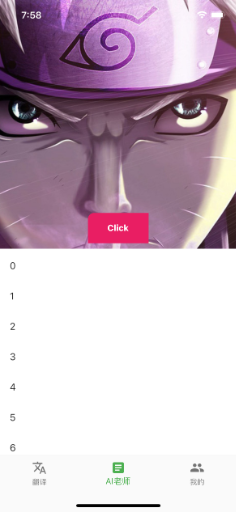
1.背景 这两天在学习手势相关的知识点,想实现一个Listview带可点击的背景视图。使用的是Stack布局,上层为Listview,下层为背景与按钮。因为Listview在上,点击手势无法穿透并向下传递,导致背景中的按钮无法响应点击事件。
几经查询,了解到IgnorePointer、AbsorbPointer组件,其中的前者就可以实现点击穿透的效果。以下就是对研究点击穿透原理过程的整理记录。
2.PointerEvents
指针事件(Pointer Events)是一种用于处理来自各种输入设备(例如鼠标、触控笔和触摸屏等)输入信息的现代化解决方案。
早期web时代只有鼠标,通过鼠标可完成mousedown、mouseover、mouseup等「鼠标事件」;如今手机平板等触屏设备普及,轻触屏幕即可与设备上的应用交互,因此又引入了「触摸事件」,如touchstart、touchend和touchmove。为解决同时维护两份事件代码的问题,人们又引入了全新的规范「指针事件」。它为各种指针输入设备提供了一套统一的事件,会自动兼容web端与移动端的事件,并返回pointerType等表明触发此事件的设备类型(鼠标/触控笔/触摸等)。
对移动端来说,指针事件可分三个阶段:手指按下、移动、抬起。
以Flutter为例,框架针对手指的按下、移动、抬起这些事件,分别封装了对应的事件对象:
事件类型 事件对象
按下
PointerDownEvent
移动
PointerMoveEvent
抬起
PointerUpEvent
需要指出的是,「指针事件」与「手势」不完全是一回事,手势是由指针事件构成的,但有更丰富的内涵,如单击、双击、拖动、旋转等。
3.HitTest 触发指针事件时,Flutter会在渲染树中执行命中测试(HitTest),以确定触摸的是哪些渲染对象。
3.1.hitTest 1 2 3 4 5 6 7 8 9 10 11 12 13 14 15 16 17 bool hitTest(BoxHitTestResult result, { required Offset position }) {if (_size!.contains(position)) {if (hitTestChildren(result, position: position) || hitTestSelf(position)) {this , position));return true ;return false ;
以上是[RenderBox.hitTest]的源码注释,是否命中逻辑的如下:
先检测点击是否在当前渲染对象(self)的size范围内;
再对子树递归执行命中测试,有子树命中通过则将self加入测试结果列表(result)中;
若子树未通过命中测试,则对self执行命中测试;
若self声明自己通过命中测试,则把self添加进测试结果列表。
测试结果列表result中储存的是所有通过命中测试的RenderBox,即触摸点下的渲染对象,这些对象将能接收和处理指针事件。
需要说明的是,不同的渲染对象对hitTest有不同的实现,以[Listener]为例:
1 2 3 4 5 6 7 8 9 bool hitTest(BoxHitTestResult result, { Offset position }) {bool hitTarget =false ;if (size.contains(position)) {if (hitTarget || behavior == HitTestBehavior.translucent)this , position));return hitTarget;
其命中测试的逻辑与[RenderBox]大致相同,只是多了一条对behavior属性的判断。
behavior
作用
deferToChild
自己是否通过命中测试取决于子组件是否通过命中测试
opaque
自己必然会通过命中测试,同时其 hitTest 返回值始终为true
translucent
自己必然会通过命中测试,但其 hitTest 返回值不一定为true
3.2.hitTestChildren 1 2 3 4 5 6 7 8 9 10 11 12 @protected bool hitTestChildren(BoxHitTestResult result, { required Offset position }) => false ;
此方法的作用是,判断是否有子节点通过了命中测试。
如果有,则将子组件添加到HitTestResult中,方法返回值true;
如果没有,则方法返回false。
对包含多个子组件的组件,该方法会递归调用子组件的hitTest方法,且是逆序进行的:
1 2 3 4 5 6 7 8 9 10 11 12 13 14 15 16 17 18 19 20 21 22 23 24 25 26 27 28 29 30 31 32 33 bool defaultHitTestChildren(BoxHitTestResult result, { required Offset position }) {while (child != null ) {final ParentDataType childParentData = child.parentData! as ParentDataType;final bool isHit = result.addWithPaintOffset(return child!.hitTest(result, position: transformed!);if (isHit) return true ;return false ;bool addWithPaintOffset({required Offset? offset,required Offset position,required BoxHitTest hitTest,final bool isHit = hitTest(this , transformedPosition);return isHit;
如果子节点A未通过命中测试,则继续逆序对其前面的兄弟节点进行命中测试;
只要有某个子节点X通过命中测试,则终止其剩余兄弟节点的遍历过程:
X前面的兄弟节点将没有机会通过命中测试,事件被X拦截;
X父节点的hitTestChildren=true;
进而使X父节点的hitTest=true,X的父节点通过命中测试;
如果所有子节点都未命中,则父节点调用hitTestSelf,父节点是否命中根据此返回值而定。
为什么存在中断机制?
因为在大多数布局中兄弟节点间不重叠,触摸点下往往只会有一个节点。因此命中测试时一旦某个节点通过测试即由它响应事件,没必要继续遍历检测其他节点了。
为什么兄弟节点间要逆序检测?
因为对于Stack这种布局,兄弟节点重叠时,后面的组件会在前面组件之上。点击时应该是上面的组件响应事件,下面的组件被遮住不能响应此事件。因此命中测试应该优先对后面的节点进行测试,一旦命中通过则不再继续遍历检测了。
3.3.hitTestSelf 1 2 3 4 5 6 7 8 @protected bool hitTestSelf(Offset position) => false ;
声明自己是否通过命中测试。
想强制自己通过命中测试时,可重写此方法并返回true。
1 bool hitTestSelf(Offset position) => behavior == HitTestBehavior.opaque;
以上是Listener中的实现,字段=opaque即可确保自己一定通过测试。
3.4.iOS响应者链 无论在原理还是具体实现上,Flutter的命中测试与iOS开发中的响应者链都十分相似:
触摸点下哪些组件能响应事件,都是由命中测试决定的;
命中测试都是从根节点开始,之后在子树中递归进行;
同级子树的命中测试都是按从后往前的顺序(逆序)进行;
父节点未通过命中测试,则子节点一定不会通过测试;
子节点通过命中测试,则父节点也一定通过命中测试;
注:这里说的是默认实现,即子类未重写原始方法的情况下!
4.事件分发 命中测试完毕后,通过测试的所有渲染节点都已加入HitTestResult列表。
完成了这一步,就确定了谁可以响应这些事件。那么节点具体是怎么处理事件的呢?这就涉及到Flutter的事件分发(Event Dispatch)。
框架会遍历HitTestResult列表,调用每个渲染对象的handleEvent方法分发处理指针事件:
1 2 3 4 5 6 7 void dispatchEvent(PointerEvent event, HitTestResult? hitTestResult) {for (final HitTestEntry entry in hitTestResult.path) {
需要注意:在命中检测时先递归检测子节点,再检测父节点。所以 HitTestResult 列表中:
所以,事件分发时也是按照此顺序进行:
子节点先于父节点处理事件;
同级子节点间按倒序处理事件。
这些也都与iOS中,事件的传递链相同~
需要说明的是,通过命中测试是以hitTest的返回值为标准。但具体能否响应指针事件,是以渲染对象是否被加入BoxHitTestResult列表为标准。上面也说过,不同的渲染对象会重写hitTest并提供自己版本的实现,以[ Listener ]为例:
1 2 3 4 5 6 7 8 9 10 11 bool hitTest(BoxHitTestResult result, { Offset position }) {bool hitTarget =false ;if (size.contains(position)) {if (hitTarget || behavior == HitTestBehavior.translucent)this , position));return hitTarget;bool hitTestSelf(Offset position) => behavior == HitTestBehavior.opaque;
当 behavior =translucent时,无论触摸点是否在 Listener 区域内,其hitTestSelf都会返回false,即 self 未通过命中测试。尽管如此,Listener还是能拦截并响应此事件,因为根据源码中的逻辑,此时 self 会被加入BoxHitTestResult列表中,在事件分发时 Listener 依然会响应此事件。
这种情况与iOS中的动态方法决议相似:
1 2 + (BOOL)resolveClassMethod:(SEL)name; // 类方法// 实例方法
表面上看,方法决议是否成功是以函数的返回值为标志,但实际上在不涉及消息转发的情况下:
若函数内为指定的SEL提供实现,无论返回YES或NO,编译都会正常进行;
若函数内并没有为SEL提供实现,无论返回YES或NO,编译都会crash;
综上,判断节点是否响应事件时,须依实际类型而定,看节点是否在BoxHitTestResult列表中。
5.拦截组件 回到开头「点击穿透」的问题,实现此功能须先研究下Flutter提供的两个组件:
二者的区别以图表形式展示如下:
IgnorePointer true false
child ❎
✅
self ❎
✅
back ✅
❎
AbsorbPointer true false
child ❎
✅
self ❎
✅
back ❎
❎
属性=false时,
作为普通容器组件,自身与子树可接收点击事件,且不会再往下传递。
属性=true时,
共同作用:
不同的是:
6.组件源码 下面通过源码看看二者在实现上的区别:
6.1.IgnorePointer 1 2 3 4 @override bool hitTest(BoxHitTestResult result, {required Offset position}) {return !ignoring && super .hitTest(result, position: position);
当ignoring字段=true时:
hitTest 直接返回 false,IgnorePointer自己和子节点的命中测试失败;
super.hitTest 被截断,自己和子节点没机会加入HitTestResult列表,都不能响应事件。
由于IgnorePointer节点的hitTest返回 false,hitTest过程会继续遍历其兄弟节点和下层节点,从而使事件有机会穿透自己,传给兄弟节点或下面的组件。
6.2.AbsorbPointer 1 2 3 4 5 6 @override bool hitTest(BoxHitTestResult result, {required Offset position}) {return absorbingsuper .hitTest(result, position: position);
当absorbing=true,且触摸点在size范围内时:
hitTest返回true,当前AbsorbPointer组件通过命中测试,事件不再往下传递;
当前AbsorbPointer的父组件也能通过命中测试,因为父组件的child的hitTest返回true;
AbsorbPointer自己与子树不能响应指针事件,因为hitTest直接返回 true,自己与子节点并没有加入HitTestResult列表中。
所以,AbsorbPointer可以被用来作为拦截指针事件的组件来使用。
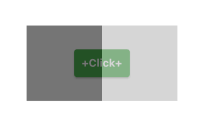
7.穿透示例
测试代码:
1 2 3 4 5 6 7 8 9 10 11 12 13 14 15 16 17 18 19 20 21 22 23 24 25 26 27 28 29 30 31 32 33 34 35 36 37 38 39 40 41 42 43 44 45 46 47 48 49 50 51 52 53 54 55 56 57 58 class DakTestPage extends StatelessWidget const DakTestPage({Key? key}) : super (key: key);@override return Stack(return Listener(print ('++++listen back' ),const EdgeInsets.all(10 )),print ('**** 有事吗? ***' ),const Text('+Click+' ,const mHeit = 100.0 ;return Listener(print ('++listen front' ),true ,print ("++listen child" ),200.0 ,
点击灰色且不与绿色按钮重合的区域时,不会有任何日志打印;
这说明:IgnorePointer禁止了子树与自己参与响应点击事件;
1 2 ++++listen back
这说明:点击手势穿透IgnorePointer组件,传递给了下面的绿色按钮;
修改代码“替换-1”、“替换-2”之后,点击灰色区域或者二者重叠区域时,打印日志:
即:AbsorbPointer禁止子树响应点击事件,但其自己可响应;同时,点击事件被拦截,下面的组件无法再响应此事件。
代码的//注意:这里我做了标注,使用Listener时,需要结合behavior的具体值,才能确定点击能否穿透到下层组件上去。比如示例代码中,设置behavior=opaque时,点击就无法穿透。
8.前文实现 回到开头的问题,为了使背景组件可点击,给Listview套一层IgrorePointer,并在背景显示完时,将ignoring属性设置为true即可。
1 2 3 4 5 6 7 8 9 10 11 12 13 14 15 16 17 18 19 20 21 22 23 24 25 26 27 28 29 30 31 32 33 34 35 36 37 38 39 40 41 42 43 44 45 46 47 48 49 50 51 52 53 54 55 56 57 58 59 60 61 62 63 64 65 66 67 68 69 70 71 72 73 74 75 76 77 78 79 80 81 82 83 84 85 86 87 88 89 90 91 92 93 94 class DakAITeacherPage extends StatefulWidget const DakAITeacherPage ({Key? key}) : super (key : key);createState () => _DakAITeacherPageState ();class _DakAITeacherPageState extends State <DakAITeacherPage > with AutomaticKeepAliveClientMixin {bool mIgnore = false ; build (BuildContext context) {build (context);return Scaffold (drawer : const DakSideDraw (),body : Stack (children : [_buildBack (), _buildList ()],_buildBack () {return Listener (behavior : HitTestBehavior.deferToChild,onPointerDown : (event) {setState (() {Container (child : Center (child : Container (width : 100 ,height : 50 ,child : TextButton (onPressed : () {print ('**** Hi? ***' );child : const Text ('Click' ,style :TextStyle (color : Colors.white, fontWeight : FontWeight.bold),_buildList () {return IgnorePointer (ignoring : mIgnore,child : Column (children : [removePadding (context : context,removeTop : true ,child : Expanded (child : NotificationListener<ScrollNotification>(onNotification : (notification) {_handleScrollNotification (notification);return false ;child : ListView.builder (padding : EdgeInsets.fromLTRB (0 , mScrollTopInset, 0 , 0 ),itemCount : 30 ,itemExtent : 50.0 ,controller : _scrollController,itemBuilder : (context, index) {return Container (color : Colors.white,child : ListTile (title : Text ("$index " ),_handleScrollNotification (ScrollNotification notification) {true ;
9.后记 以上点击穿透案例是对PointerEvents一次很好的实践,后续还有很多需要学习,继续期待~